Roasted Chicken
So last week, my oven shorted out and tried to explode!… Well, kind of… But it was scary and bad enough that we had to get a new oven! It took us a few days to decide on which one we wanted to replace it with and then, of course, a few more days until it got delivered. Five days without an oven or stovetop will really put your creativity and cooking skills to the test! I still “cooked” three meals a day for my family using the microwave, electric griddle and toaster 🙂 It was kind of fun but man was I happy when the new unit arrived! Isn’t it pretty?! 
The first thing that I cooked in it was this recipe. I roast a whole chicken about once a week. My family and I can eat off of it/ use it in various recipes for days! Seriously, if I use it right, I can get 5-6 meals out of one 6-7lb bird!
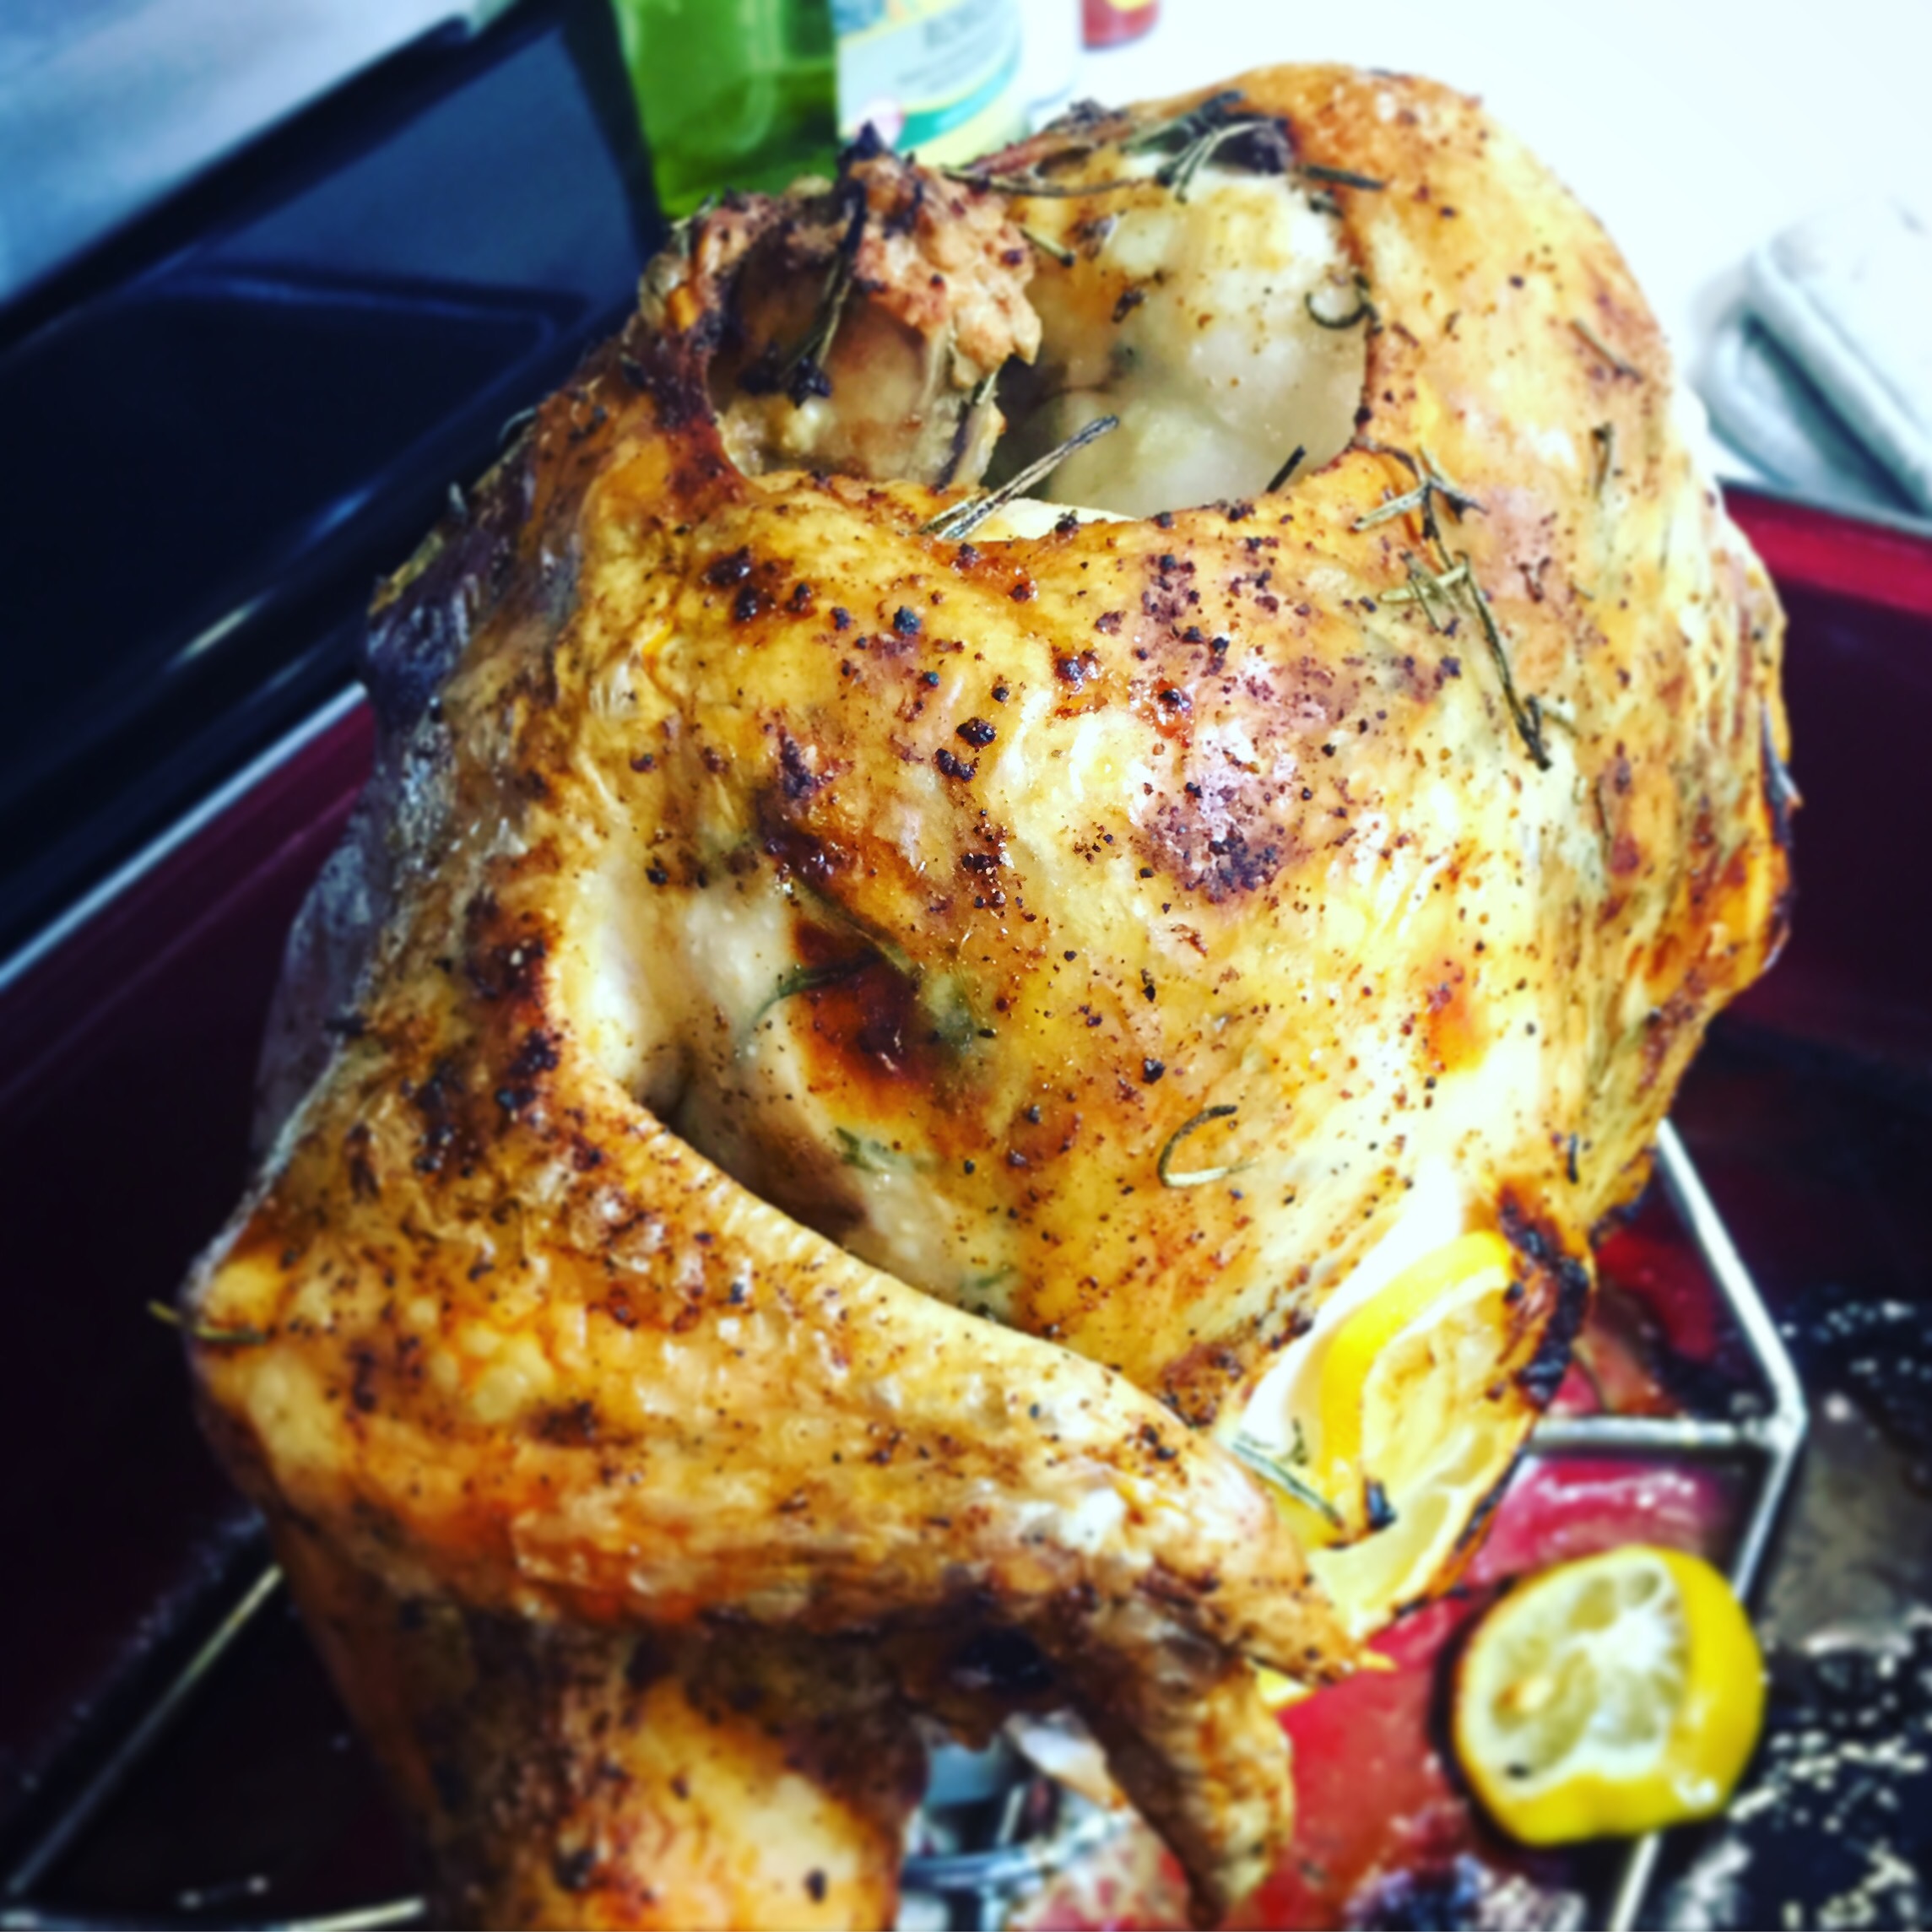
I like to roast my chickens “beer can style” because they always come out juicy and some of the extra fat drips off in the pan instead of cooking in its fat like in a crockpot. If you happen to have one of these beer can chicken stands, awesome! If not, you can still just place your chicken over any can and sit it up in your roasting pan, you’ll just have to be careful when moving it in and out of the oven.

You don’t have to use a beer. You could use a Coke or Sprite or even just water if you accidentally drink all of the beer (just save the can)! The can only need to be 1/2- 3/4 full so take a few sips, pour a little into the bottom of the roasting pan and put the can in the holder of you’re using one.
After you take your chicken out of the packaging and remove any extras that may be inside the cavity, pat it completely dry with a paper towel. This will ensure crispy skin 😋 Place the bird over the can.

I find it easier to put the rub on when I’m not having to hold onto the chicken at the same time- much less chance of contaminating things with chicken goo.
Most of the time I just put a rub on the outside of the chicken and call it good but I had a lemon that I need to use and a bunch of rosemary from my garden that has been drying for far too long in my pantry (don’t judge! I have two toddlers and not enough time for everything!).

So if you want to put things like lemon/lime slices or fresh/dried herbs, then you need to create a space to put them. Pull the skin back and work your fingers in between the skin and the meet and slide them down the front of the breasts. You didn’t know you were making it second base today, did ya?!


Now slide lemon slices and herbs into the pockets you made


Now, rub a tablespoon of extra virgin olive oil on the entire outside of the chicken then rub in whatever spices or rub that you’d like. I like this sodium free spice rub that my sister got for me.


Now pop this beauty into a 400 degree oven on the bottom rack (you may have to take the other rack out). Cooking time will depend on the size of your bird, but I typically buy a 6lb chicken that is done in 90 minutes. If you have a 3-4lb chicken, check the internal temp at one hour. Once the center of the breast and thigh reaches 160 degrees and/or the juice runs out clear when you insert a thermometer, it’s done!

Look at that crispy goodness!! If you’re not going to tear into it immediately, tent it with some foil and let it rest. Letting meat rest like this prevent all of the juice from running out when you cut into it and drying the whole thing out.
I served this one with roasted carrots and Brussels sprouts- yum!!!

Bon appetite!

Looks awesome Lindsey! I love oven roasting chickens too! I also did a lot of leftovers for the week like chicken enchiladas and chicken pot pie to name a couple. I have not heard of the beer can method, but I would love to try that!
Thanks, Aunt Jeanne! I think I’m going to use my leftovers for a curry this week 🙂